Accessing your Raspberry Pi over the internet opens up endless possibilities, from remote monitoring to managing projects from anywhere in the world. This guide will walk you through the process step-by-step, ensuring you can securely connect to your Raspberry Pi from anywhere with an internet connection.
In today's digital era, remote access has become essential for many projects, and Raspberry Pi is no exception. Whether you're a hobbyist or a professional developer, learning how to use access Raspberry Pi over the internet can significantly enhance your productivity and flexibility.
This article will provide you with all the necessary information, including setup procedures, security measures, and troubleshooting tips. By the end of this guide, you'll be confident in setting up remote access for your Raspberry Pi while keeping it secure.
Read also:Lakeside Collection Home Decor Transform Your Space With Natureinspired Elegance
Table of Contents
- Introduction to Raspberry Pi Remote Access
- Raspberry Pi Basics
- Why Use Remote Access?
- Setup Process
- Security Measures for Remote Access
- Tools and Software
- Step-by-Step Guide
- Troubleshooting Tips
- Best Practices
- Conclusion
Introduction to Raspberry Pi Remote Access
Accessing Raspberry Pi over the internet is a powerful feature that allows you to control and manage your device remotely. This capability is particularly useful for projects that require constant monitoring or updates without physical presence.
Remote access is not just about convenience; it also enhances collaboration and scalability. For instance, if you're working on an IoT project, being able to access your Raspberry Pi from anywhere can save time and resources.
However, it's crucial to approach remote access with caution. Security should always be a top priority to prevent unauthorized access and potential data breaches.
Raspberry Pi Basics
What is Raspberry Pi?
Raspberry Pi is a small, affordable computer that can be used for a variety of projects, from home automation to robotics. It's a versatile device that has gained popularity among hobbyists, educators, and professionals alike.
Some key features of Raspberry Pi include:
- Compact size
- Low power consumption
- Wide range of supported software
- Community-driven support
Why Use Remote Access?
Benefits of Remote Access
Using remote access for Raspberry Pi offers several advantages:
Read also:Josephine Jackson 2025 A Comprehensive Guide To Her Life Career And Influence
- Convenience: Manage your device from anywhere without needing to be physically present.
- Efficiency: Quickly troubleshoot issues or update software without delays.
- Collaboration: Work with others on projects regardless of geographical location.
These benefits make remote access an essential tool for anyone working with Raspberry Pi.
Setup Process
Preparing Your Raspberry Pi
Before setting up remote access, ensure your Raspberry Pi is properly configured:
- Install the latest version of Raspberry Pi OS.
- Set up a static IP address for your Raspberry Pi.
- Enable SSH (Secure Shell) on your device.
These steps will lay the foundation for a successful remote access setup.
Security Measures for Remote Access
Securing Your Raspberry Pi
Security is paramount when accessing Raspberry Pi over the internet. Follow these best practices to protect your device:
- Use strong, unique passwords.
- Implement two-factor authentication (2FA).
- Regularly update your Raspberry Pi OS and software.
By prioritizing security, you can enjoy the benefits of remote access without compromising your device's safety.
Tools and Software
Essential Tools for Remote Access
Several tools and software can facilitate remote access to your Raspberry Pi:
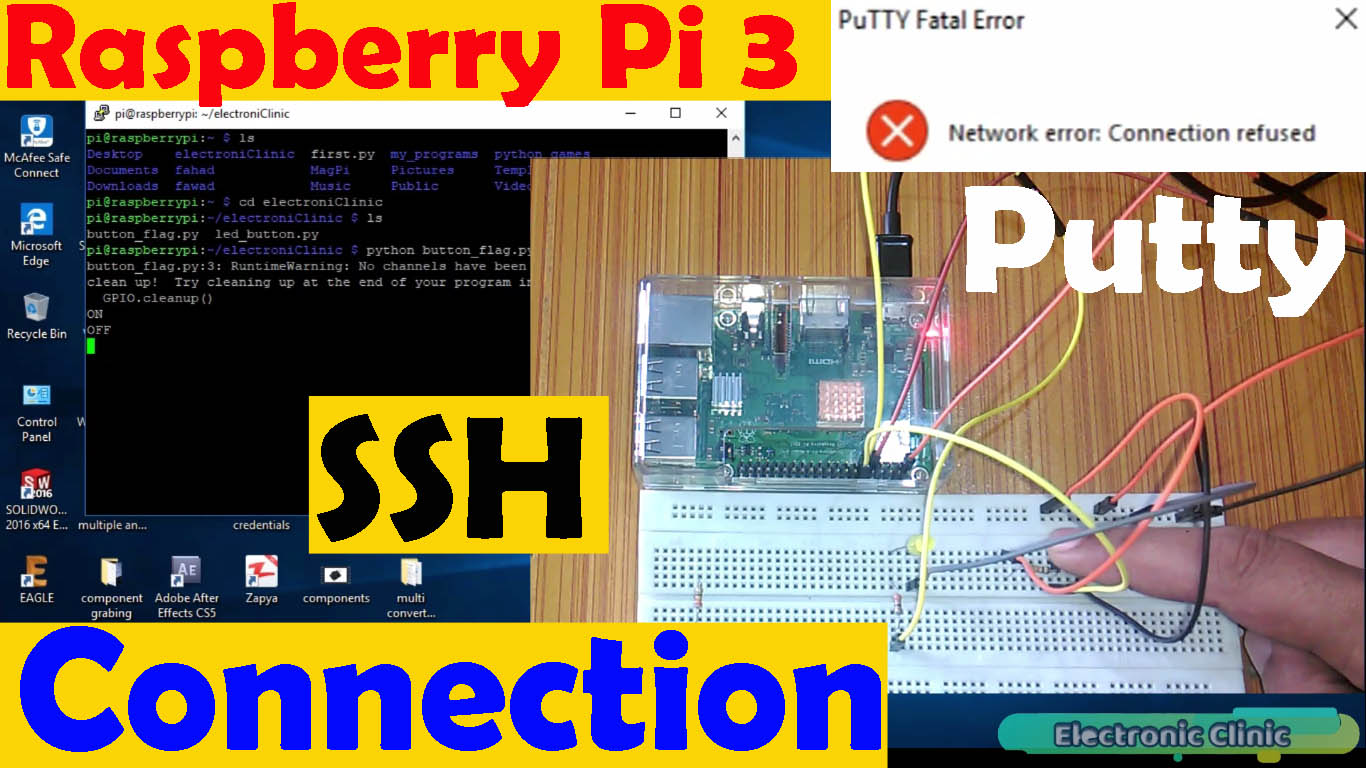
- SSH Clients: PuTTY, Terminal, or any SSH-compatible client.
- Port Forwarding: Configure your router to forward traffic to your Raspberry Pi.
- Dynamic DNS Services: Use services like No-IP or DuckDNS to maintain a stable connection.
These tools will streamline the process of accessing your Raspberry Pi remotely.
Step-by-Step Guide
Setting Up Remote Access
Follow these steps to set up remote access for your Raspberry Pi:
- Enable SSH: Open Raspberry Pi Configuration and enable SSH.
- Set Static IP: Configure your network settings to assign a static IP address.
- Configure Port Forwarding: Access your router's settings and forward port 22 to your Raspberry Pi's IP address.
- Install Dynamic DNS: Sign up for a dynamic DNS service and install the client on your Raspberry Pi.
- Test the Connection: Use an SSH client to connect to your Raspberry Pi using its public IP or dynamic DNS address.
By following these steps, you'll have a functional remote access setup for your Raspberry Pi.
Troubleshooting Tips
Common Issues and Solutions
Here are some common issues you might encounter and how to resolve them:
- Unable to Connect: Ensure SSH is enabled and the correct IP address is used.
- Port Forwarding Issues: Double-check your router's settings and ensure the correct port is forwarded.
- Dynamic DNS Problems: Verify your dynamic DNS service is correctly configured and updated.
Addressing these issues promptly will ensure a smooth remote access experience.
Best Practices
Optimizing Your Remote Access Setup
To maximize the effectiveness of your remote access setup, consider the following best practices:
- Regularly monitor your Raspberry Pi's activity logs.
- Limit access to trusted devices and IP addresses.
- Keep your software and firmware up to date.
These practices will help you maintain a secure and efficient remote access environment.
Conclusion
In conclusion, learning how to use access Raspberry Pi over the internet can greatly enhance your ability to manage and monitor your projects remotely. By following the steps outlined in this guide and implementing the recommended security measures, you can enjoy the flexibility and convenience of remote access while keeping your device secure.
We encourage you to share your experiences or ask questions in the comments section below. Additionally, feel free to explore other articles on our site for more tips and tutorials related to Raspberry Pi and other tech topics.
References: